

April 10, 2023
Refrigerator Repair
Do you ever find yourself in the produce aisle, stocking up on fresh fruits and vegetables that you don’t think will last until you get a chance to cook them? Don’t worry—freezing them is an easy solution! With just a few simple steps, you can preserve your produce for later use.
Read on to learn some helpful tips for how to freeze vegetables so that they taste great when you cook them later. Whether you’re new to food preservation or looking for ways to reduce waste from spoiling food products, this guide is for everyone interested in learning how to freeze produce.
What kind of vegetables can you freeze?
When deciding which produce to freeze, it’s best to pick the freshest and finest quality available. Make sure to sort the veggies by size so that you can portion out the correct amount for each batch.
Wash and prepare your vegetables as you normally would for cooking. You can freeze almost any vegetable you can think of. There are some exceptions, though. We discuss them below.
Which vegetables don’t freeze well?
Vegetables that contain a high amount of water, such as cabbage, celery, cucumbers, lettuce, or radishes, should not be frozen. These types of vegetables tend to become mushy and lose their texture and taste when they are frozen. The best way to preserve these vegetables is to keep them refrigerated and eat them before they go bad.
Herbs and spices should also not be frozen. Herbs lose their texture and flavor, while spices can lose or change their taste.
How to freeze vegetables
If you’re looking to freeze your favorite veggies, blanching is an essential part of the process. Blanching helps protect the flavor, color, and texture of your vegetables by slowing down or stopping the action of enzymes. It’s also a great way to get rid of dirt, brighten the color and help preserve vitamins.
Blanching also makes packing them easier by softening up the veggies. But pay special attention to how long you blanch each vegetable—under-blanching won’t be as effective, while over-blanching can cause a loss of flavor and nutrients. Check out the list of instructions below for specific blanching times for each type of veggie before you start.
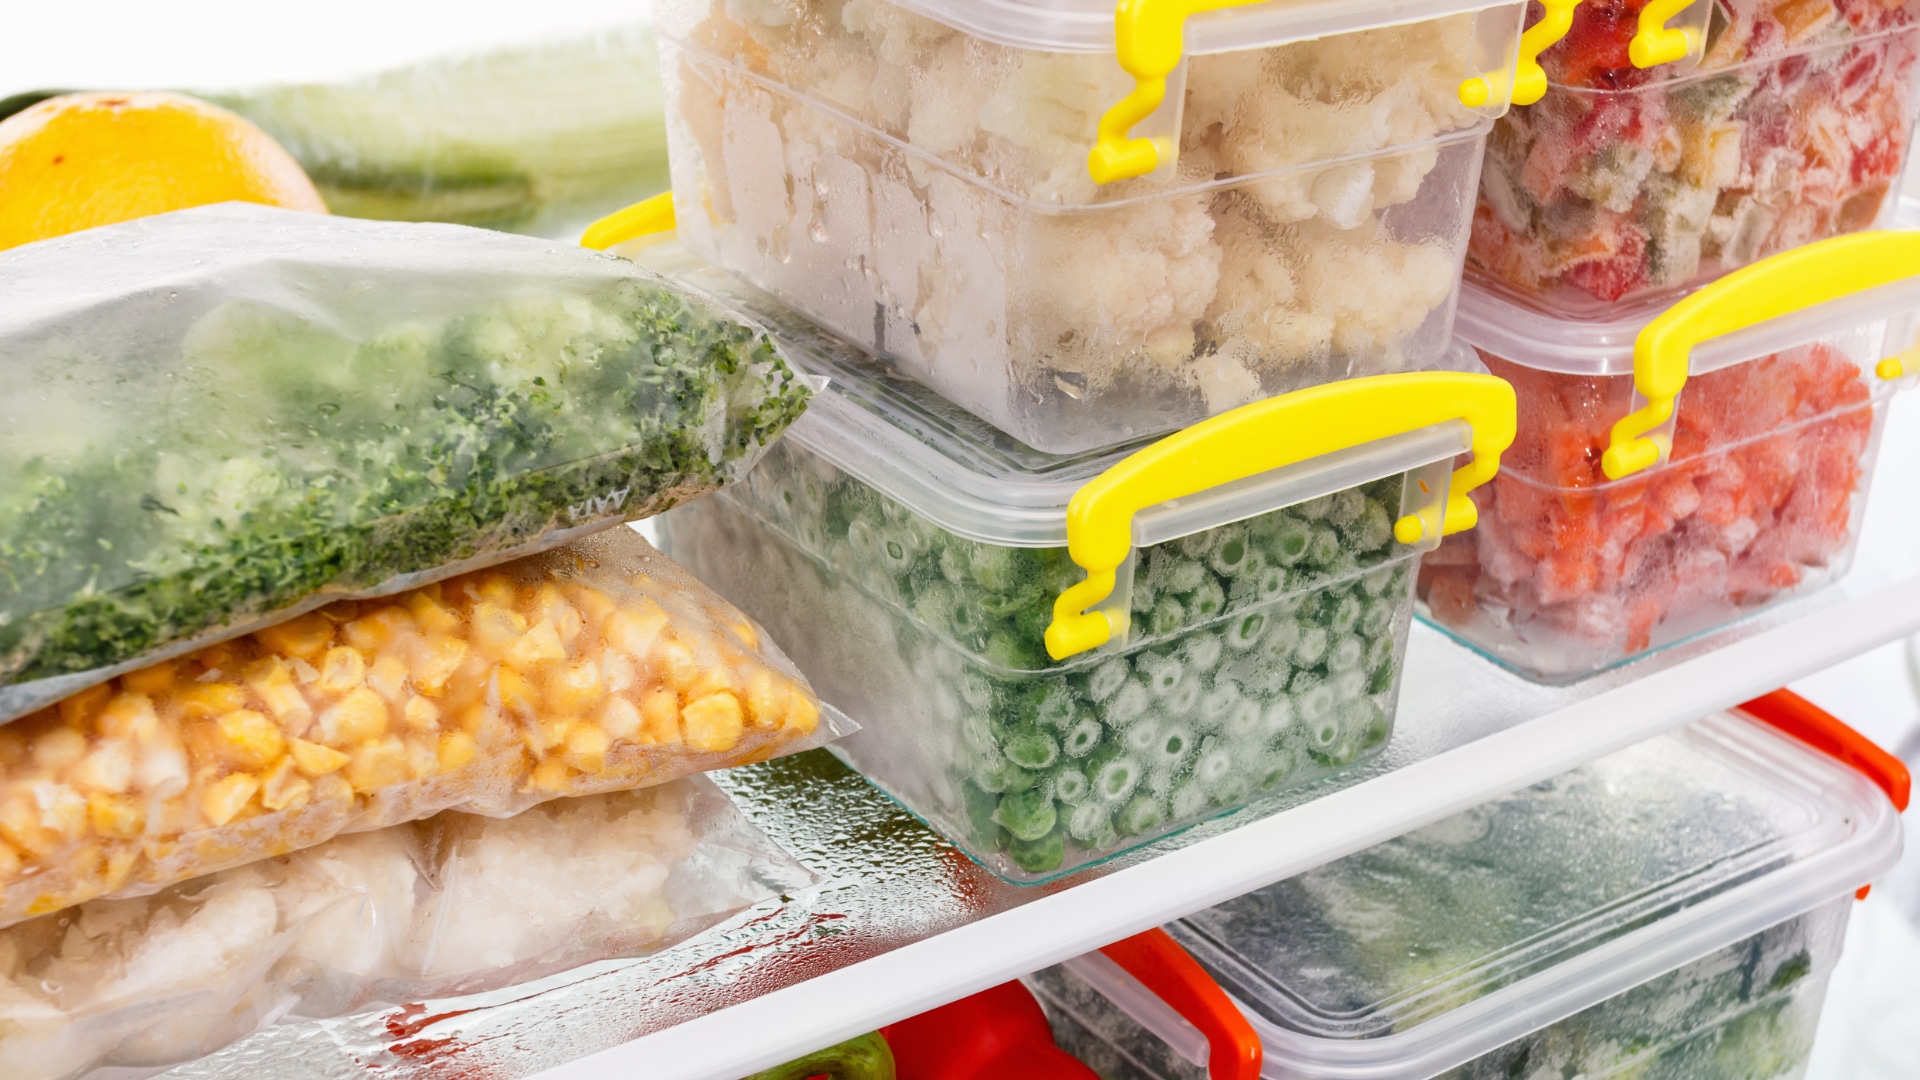
How to store frozen vegetables
You can use freezer bags and glass or plastic containers, depending on the size of the veggies you want to store. When packing your vegetables for freezing, the method depends on how you want to use them when you cook them. If you’ll use a lot at once, use the dry packing method below. If you tend to only cook one or two at a time, use the Tray Packing method.
Dry packing
To dry-pack your vegetables, place them in meal-sized freezer bags or containers, making sure to pack them tightly and leave 1⁄2-inch headspace at the top of rigid containers. For freezer bags, fill them up within three inches of the top, and twist and fold back the excess material—a rubber band about 1⁄2- to 3⁄4-inch from the food will help with this. No need for any extra space if you’re freezing veggies like broccoli, asparagus, or brussels sprouts—they won’t expand as much as other vegetables.
Tray packing
For tray-packing, place your chilled, well-drained veggies in a single layer on shallow trays or pans and freeze until firm. Remove the tray from the freezer and quickly fill bags or containers with them before freezing immediately. With this method, your food won’t freeze together into one big lump, allowing you to take out as much as you need without any hassle.
How to blanch vegetables
To blanch vegetables for freezing, start by preparing an ice bath in a large bowl or pot. Bring a different pot of water to a boil on the stovetop, and add one tablespoon of salt for every quart of water you use.
Put the vegetables in the boiling water for 2-3 minutes, depending on their size, stirring them occasionally, so they do not stick together. When the vegetables are done cooking, immediately remove them from the heat and plunge them into the ice bath. Leave them there until completely cool before draining and transferring them to airtight containers or freezer bags.
Asparagus
- Blanch small stalks for 2 minutes.
- Blanch medium stalks for 3 minutes.
- Blanch large stalks for 4 minutes.
Green beans
- Remove ends.
- Blanch for 3 minutes.
Lima, butter, or pinto beans
- Rinse and sort the beans according to size.
- Blanch small beans for 2 minutes.
- Blanch medium beans for 3 minutes.
- Blanch large beans for 4 minutes.
Beets
- Trim leaves.
- Boil until tender, approximately 30 minutes for small beets and 45 minutes for medium beets.
- Peel, remove stem and root and cut into slices or cubes.
Broccoli
- Trim into pieces no more than 1½ inches.
- Blanch for 3 minutes.
Brussels sprouts
- Remove outer leaves.
- Blanch small sprouts for 2 minutes.
- Blanch medium sprouts for 3 minutes.
- Blanch large sprouts for 4 minutes.
Carrots
- Peel and remove tops.
- Cut into the final desired form (sliced, cubed, strips).
- Blanch for 2 minutes.
- Leave baby carrots whole and blanch for 3 minutes.
Cauliflower
- Break into pieces 1 inch across.
- Blanch for 3 minutes.
Corn kernels
- Blanch cob for 4 minutes.
- Cut kernels off of the cob.
Corn on the cob
- Blanch small ears for 7 minutes.
- Blanch medium ears for 9 minutes.
- Blanch large ears for 11 minutes.
Eggplant
- Peel and slice 1/3 inch thick.
- Blanch for 4 minutes in water with 1/2 cup of lemon juice.
Greens
- Remove stems.
- Blanch collard greens for 3 minutes.
- Blanch all others for 2 minutes.
Mushrooms
- Choose mushrooms free of spots.
- Blanch whole or quarters mushrooms for 3½ minutes.
- Blanch slices for 3 minutes.
Peas
- Blanch 1 ½ minutes.
Hot peppers
- These can be frozen without blanching.
- Remove stems.
Bell peppers
- Remove stems and seeds.
- Cut into halves, strips, or rings.
- Blanch halves for 3 minutes.
- Blanch rings or strips for 2 minutes.
Pumpkin
- Wash, slice, peel, and remove seeds.
- Cut into cubes, and cook until soft using your preferred method.
- Boil, steam, or bake in the oven at 350 degrees for 20 minutes.
- Mash, package, and freeze.
Potatoes
- Wash, peel, and quarter.
- Blanch for 3-5 minutes.
Sweet potatoes
- Peel and cut into cubes.
- Cook until tender using your preferred method—see pumpkin above.
- Mash, package, and freeze.
Tomatoes
- Blanch for 30 seconds.
- Peel and core.
- Prepare in your preferred method for cooking (sliced, cubed, whole).
Tomato juice
- Cut tomatoes into quarters, simmer for 5-10 minutes, and pass through a sieve.
- Cool and freeze.
Turnips
- Wash, peel, and cut into 1/2-inch cubes.
- Blanch for 2 minutes.
Final thoughts
It’s easy to see why so many people rely on this convenient practice. Not only does it allow us to store our favorite vegetables for a long time, but it’s also a great way to kick off fantastic and flavorful recipes.
Although there are some essential rules to keep in mind when freezing and thawing, if you follow these tips and work with the best produce you can find, the result will be delicious and unbeatable. Whether you use frozen vegetables for pasta, soups, or even smoothies, your cooking game will get an instant upgrade!
We hope this guide has helped you learn how to freeze vegetables properly. Now you can enjoy your favorite dishes longer, and avoid the food waste that comes from spoiled produce.

Apr. 09, 2024
How to Fix the Whirlpool Washer F5 E3 Error Code
Mar. 06, 2024
10 Steps to Clean Your Fridge Water Dispenser

Feb. 05, 2024
How to Replace a Whirlpool Refrigerator Water Filter
Jan. 03, 2024
How to Clean an Oven Glass Door (3 Easy Methods)
Dec. 11, 2023
Why Your Microwave Plate Is Not Spinning

Nov. 06, 2023
Washer Spin Cycle Not Working? Here’s Why

Oct. 02, 2023
How to Fix a Slow Ice Maker
Sep. 08, 2023
Why Does My Dishwasher Smell like Sewage?
Jul. 31, 2023
What Causes a Dryer to Overheat? (and How to Fix It)

Jul. 19, 2023